



Cómo solucionar el bloqueo de la boquilla de descalcificación: 3 señales de advertencia y una guía rápida de limpieza de 15 minutos
En una laminadora en caliente moderna, cada minuto de inactividad no planificada cuesta miles de dólares. Cuando el acero sale con defectos superficiales o empiezan a parpadear las alarmas de presión del sistema, el culpable suele ser el componente más pequeño de la línea: una boquilla descalcificadora obstruida. Ignorar estas señales tempranas no solo conduce a los resortes rechazados; Puede causar daños catastróficos en tus bombas y tuberías de alta presión. En esta guía completa, desglosaremos las tres principales señales de alerta temprana del atasco de la boquilla de descalcificación y proporcionaremos un protocolo de limpieza infalible de 15 minutos para que tu producción vuelva a funcionar de forma segura y eficiente.
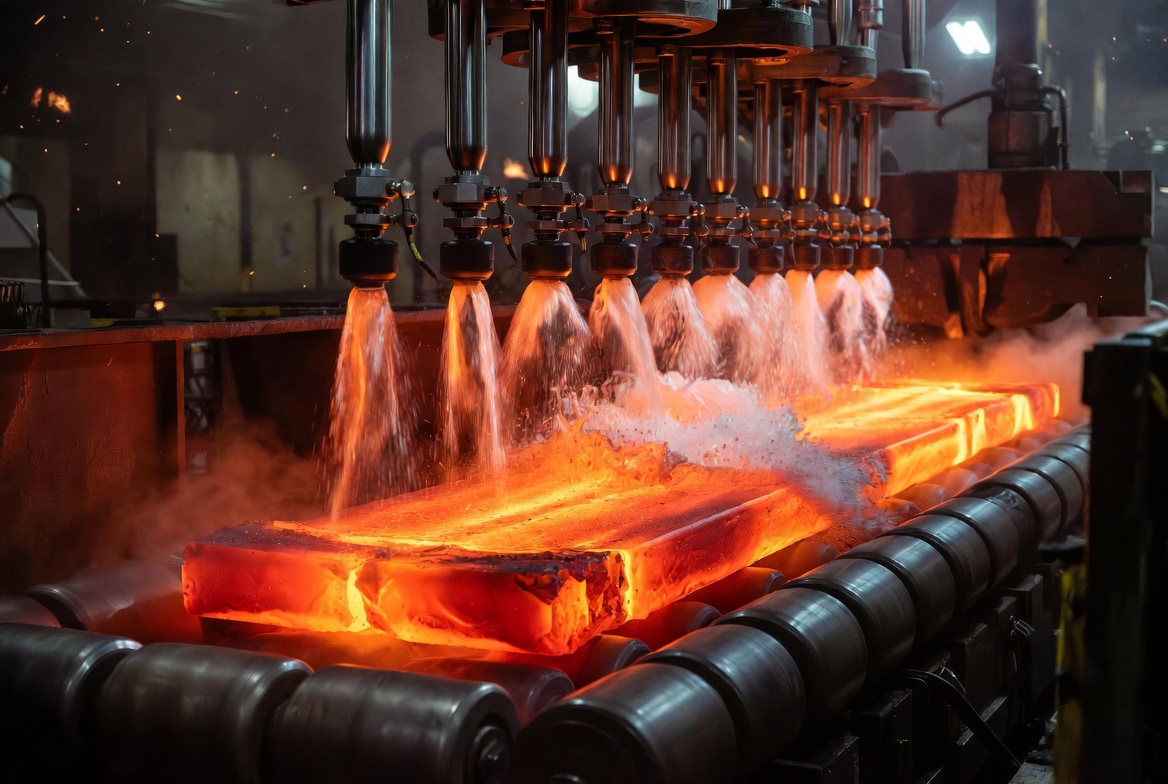
! Placa de acero al rojo vivo pasando bajo el sistema de descalcificación a alta presión
- 1. 1. Entendiendo el atasco de boquillas de descalcificación: lo básico
- 2. 2. Conceptos Básicos Simplificados
- 2.1. Tabla Comparativa de Conceptos Básicos
- 3. 3. Las 3 señales de advertencia de una boquilla obstruida
- 3.1. 3.1 Señal de advertencia 1: 'Rayas de tigre' en la superficie de acero
- 3.2. 3.2 Señal de advertencia 2: Fluctuaciones de presión inexplicables
- 3.3. 3.3 Señal de advertencia 3: Vibración anormal y ruido hidráulico
- 4. 4. Guía paso a paso: El protocolo de limpieza segura de 15 minutos
- 4.1. Especificaciones y tabla de selección de herramientas de limpieza
- 4.2. Paso 1: Bloqueo/Etiquetado (LOTO) y Despresurización
- 4.3. Paso 2: Exploración segura (La Regla de Oro)
- 4.4. Paso 3: Retrodescarga del sistema
- 5. 5. Consejos de expertos y trampas comunes que hay que evitar
- 6. 6. Conclusión y reflexiones finales
- 7. 7. Resumen rápido
- 8. 8. Preguntas frecuentes (FAQ)
1. Entendiendo el atasco de boquillas de descalcificación: lo básico
Para los ingenieros de mantenimiento y los responsables de equipos de la industria del acero, el proceso de descalcificación es la defensa final contra la mala calidad superficial. Cuando se calienta una losa de acero, se forma una capa de óxido de hierro (escama) en su superficie. Se utilizan chorros de agua a alta presión para eliminar esta escama antes de rodar.
Sin embargo, el entorno de los molinos es notoriamente duro. Incluso con sistemas de filtración avanzados, escombros microscópicos, escamas de tubería o fragmentos degradados pueden llegar a las tuberías de agua a alta presión. Cuando una boquilla se obstruye, la fuerza de impacto disminuye, el patrón de pulverización se distorsiona y se pierde la superposición protectora entre las boquillas.
Detectar un atasco pronto es la diferencia entre una intervención rápida de mantenimiento de 15 minutos y perder todo un turno por fallos de equipos o materiales desguazados. Ser proactivo en lugar de reactivo es la regla de oro del mantenimiento industrial.
2. Conceptos Básicos Simplificados
Antes de lanzarse a la resolución de problemas, es fundamental entender la física en juego. Vamos a desglosar la jerga técnica en un lenguaje sencillo.
- Colector de descalcificación: Imagina una enorme barra de aspersores agrícola, pero en lugar de regar los cultivos, funciona a presiones superiores a 150 a 400 bar (más de 100 veces la presión de un neumático estándar). Se extiende a lo largo de la placa de acero, sosteniendo filas de boquillas de precisión.
- Fuerza de impacto: Este es el verdadero "golpe" que el agua da a la superficie de acero. Piénsalo como usar una hidrolavadora de alta presión para pelar la pintura persistente de una pared. Si la boquilla está parcialmente bloqueada, la energía se disipa y el óxido permanece en el acero.
- Choque hidráulico (golpe de arie): Cuando el agua que viaja a alta velocidad se ve obligada de repente a detenerse o cambiar de dirección (debido a un atasco o a una válvula que se cierra rápidamente), se crea una onda de choque masiva. Suena como si alguien estuviera golpeando tus tuberías con un mazo.
Tabla Comparativa de Conceptos Básicos
| Concepto | ¿Qué es (Técnico) | Analogía en inglés sencillo | Consecuencia del fracaso |
|---|---|---|---|
| Encabezado de descalcificación | Colector de alta presión que distribuye agua a las toberas. | La tubería principal de agua que alimenta varias alcachofas de ducha. | Pérdida total de capacidad de desincrustación en toda la losa. |
| Fuerza de impacto | Energía cinética de las gotas de agua por milímetro cuadrado. | El "poder de fregado" de una hidrolimpiadora. | La incrustación permanece en el acero, causando defectos laminados. |
| Solapamiento de spray | La intersección calculada de patrones de salpicaduras adyacentes. | Pintar una pared con trazos de rodillo superpuestos. | Restos sin descalcar en la superficie del material. |
3. Las 3 señales de advertencia de una boquilla obstruida
Solucionar problemas en un entorno ruidoso y de alta temperatura requiere saber exactamente qué buscar, escuchar y vigilar. Aquí tienes tres señales innegables de que tus boquillas necesitan atención inmediata.
3.1 Señal de advertencia 1: 'Rayas de tigre' en la superficie de acero
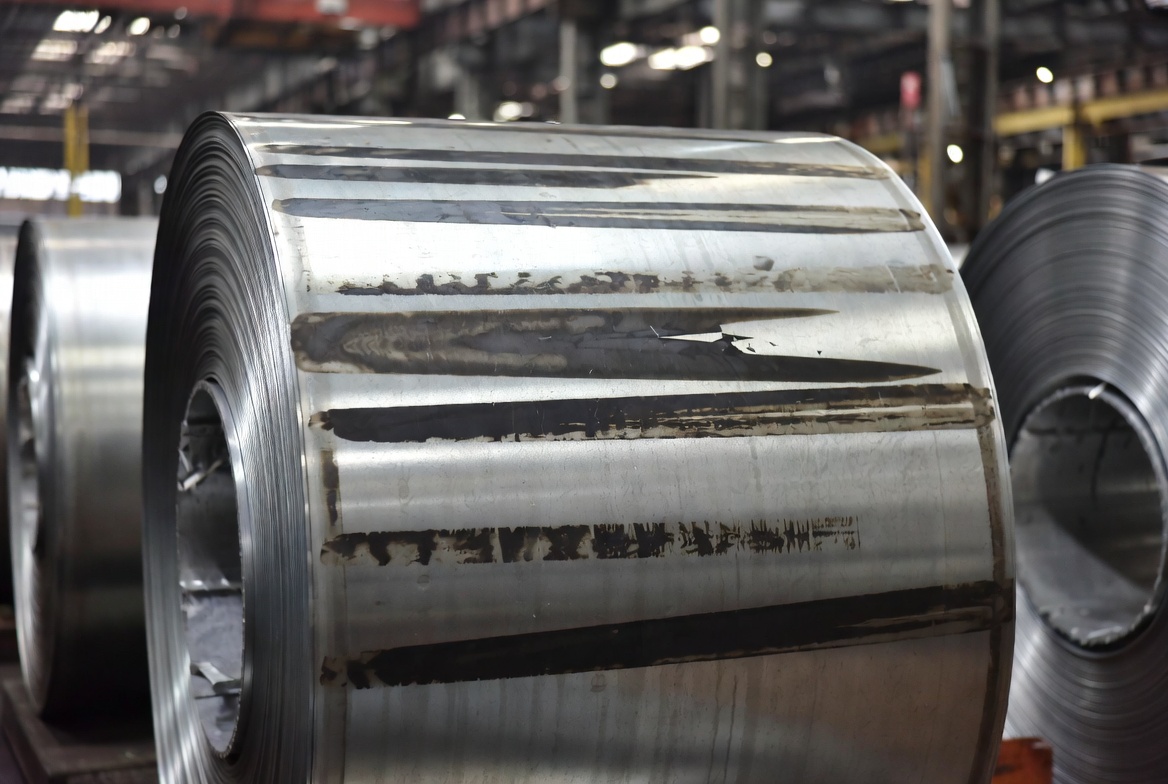
El indicador más inmediato y visual de una boquilla obstruida es la aparición de "Rayas de Tigre" en el acero laminado.
¿Qué lo causa? Las boquillas descalcificadoras están diseñadas para tener un ángulo de pulverización específico, asegurando que cada chorro de agua se solape ligeramente con su vecino. Esto garantiza una cobertura del 100%. Si una boquilla se obstruye parcial o totalmente, su ángulo de pulverización se estrecha. Piénsalo como lavar tu coche con una ducha sucia: el agua no se dispersa correctamente, dejando rastros de suciedad. En una losa de acero, esta falta de solapamiento deja tiras longitudinales de óxido de hierro sin eliminar, que luego se enrollan dentro del acero, creando franjas oscuras permanentes.
! Bobina de acero laminado que muestra rayas oscuras longitudinales conocidas como rayas de tigre
3.2 Señal de advertencia 2: Fluctuaciones de presión inexplicables
Tu sistema SCADA o manómetros locales son tus mejores herramientas de diagnóstico. Si notas micropicos o caídas bruscas en la presión de cabeza, probablemente se esté formando un atasco.
La física detrás de ello: Imagina pellizcar una manguera de jardín corriendo con los dedos. La bomba de agua sigue intentando empujar el mismo volumen de agua, pero la salida está restringida. Esto provoca que la presión interna dentro del colector se dispare. Por el contrario, si los restos son lanzados repentinamente a través del orificio—o peor aún, si el pico de presión hace que la punta de la boquilla se fracture y se salga—la presión caerá en picado. Monitorizar tu sistema para detectar estas ondas de presión erráticas es fundamental.
3.3 Señal de advertencia 3: Vibración anormal y ruido hidráulico
Cuando una pipa empieza a "toser", tienes un problema serio. Una boquilla obstruida altera la dinámica interna de fluidos del colector.
En lugar de un flujo laminar suave que sale de las boquillas, el flujo restringido genera turbulencias severas. Esto se manifiesta como un siseo agudo o vibraciones rítmicas violentas en el conjunto del cabecero. Si no se controla, esta turbulencia puede desencadenar un devastador efecto de golpe de ariete. Las ondas de choque pueden romper los componentes internos de la boquilla cerámica o de carburo y romper los sellos de las tuberías.
Si sospechas que tu sistema sufre esto, es muy recomendable aprender a resolver el golpe de ariete en sistemas de descalcificación para proteger tu infraestructura de choques hidráulicos.
4. Guía paso a paso: El protocolo de limpieza segura de 15 minutos
Cuando se confirma un atasco, la velocidad es esencial, pero la seguridad es fundamental. Las lesiones por inyección de agua a alta presión son mortales. Sigue siempre las directrices establecidas por la Association for Iron & Steel Technology (AIST) respecto al mantenimiento de sistemas de alta presión.
Especificaciones y tabla de selección de herramientas de limpieza
Antes de empezar, asegúrate de tener las herramientas adecuadas. Usar el material equivocado destruirá permanentemente la geometría interna de la boquilla.
| Tipo de herramienta | Material | Dureza (Mohs) | Uso recomendado | Nivel de riesgo |
|---|---|---|---|---|
| Sonda de plástico | Nailon / PTFE | 2 - 3 | Limpiar escombros blandos, acumulación biológica. | Muy bajo (Seguro) |
| Pick-up de latón | Aleación de latón | 3 - 4 | Desalojar la tubería rebelde o el óxido. | Bajo (Seguro) |
| Alambre de Acero | Acero al carbono | 6 - 7 | NO USAR. Araña el orificio interno. | Alto (Destructivo) |
Paso 1: Bloqueo/Etiquetado (LOTO) y Despresurización
Nunca intentes atender un conector que aún esté bajo presión.
- Apagar la bomba principal de alta presión.
- Cierra las válvulas de aislamiento que alimentan el colector de la vía.
- Abrir las válvulas de purga/drenaje para liberar toda la presión hidráulica residual.
- Verificar que el manómetro marque exactamente 0 bar (0 PSI) antes de acercarse al equipo.
Paso 2: Exploración segura (La Regla de Oro)
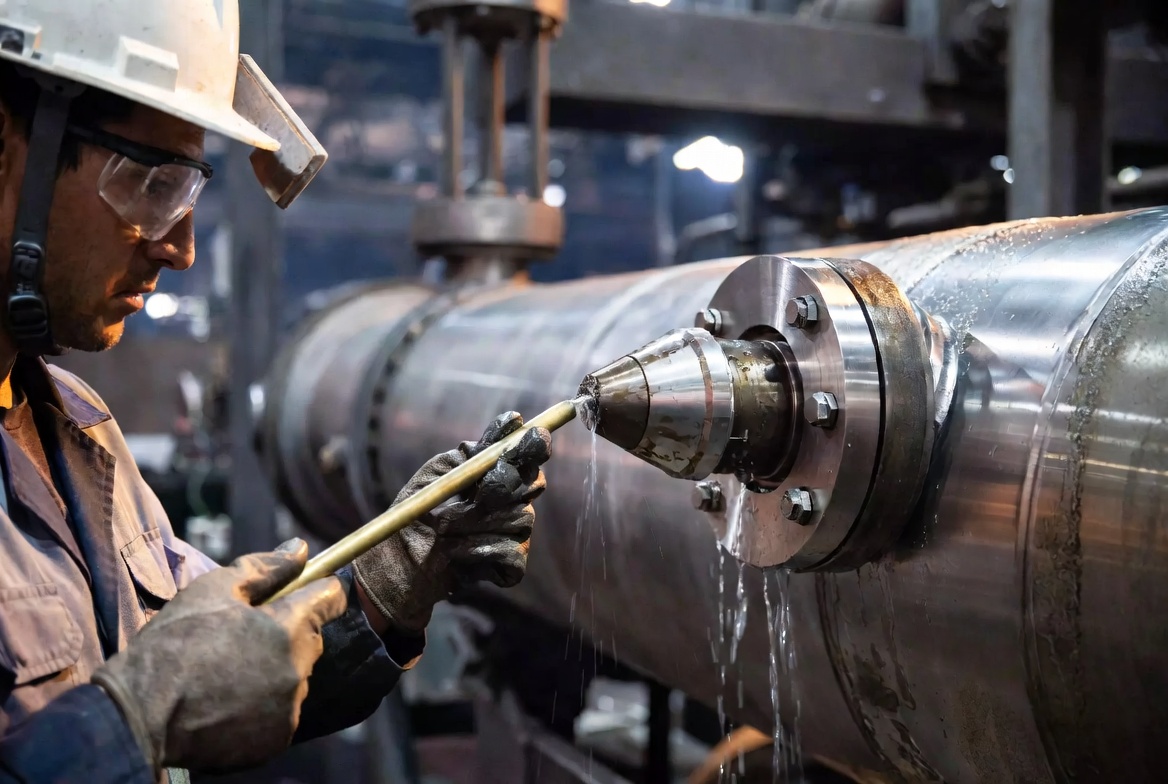
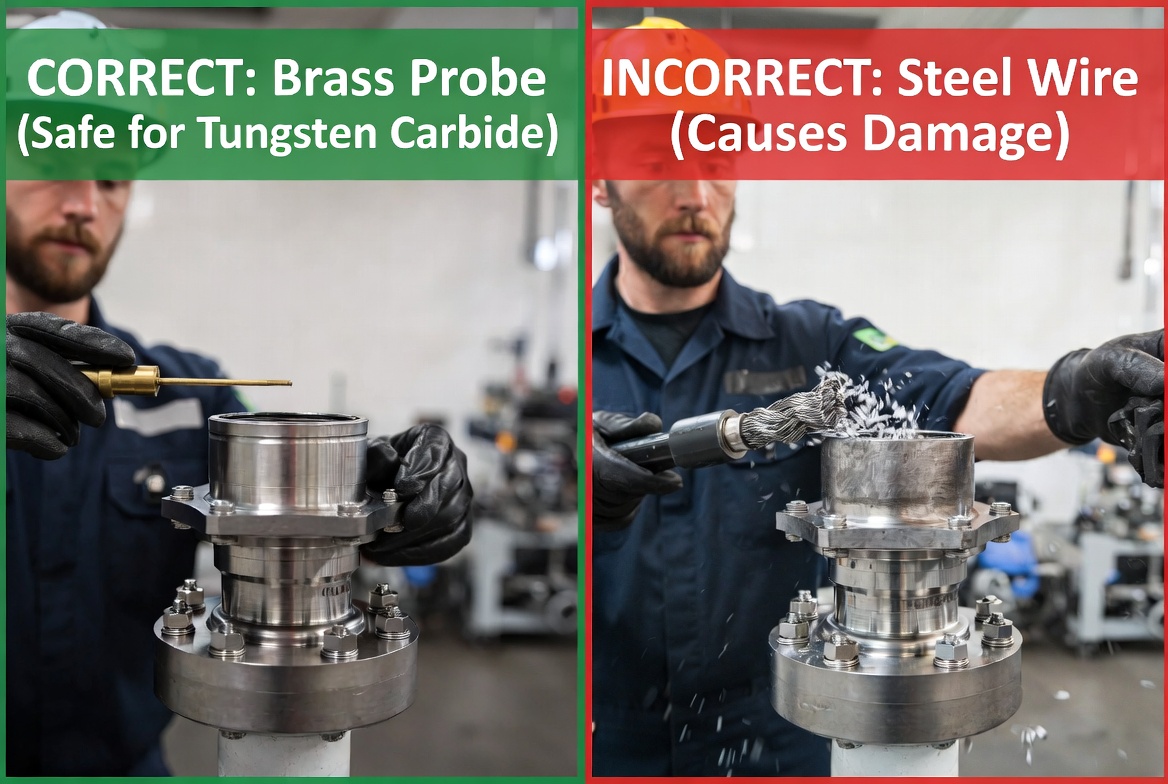
Quita la tapa de la boquilla y extrae la punta. Advertencia crucial: Nunca uses un alambre de acero duro o un destornillador para atravesar el orificio de la boquilla. Incluso arañazos microscópicos en el canal interior alterarán permanentemente el patrón de pulverización y destruirán la fuerza del impacto.
Al tratar con materiales de alta calidad, es fundamental entender la diferencia entre carburo de tungsteno y acero endurecido. El carburo de tungsteno es increíblemente resistente al desgaste, pero puede astillarse mediante palanca agresiva con herramientas de acero endurecido. Siempre usa una sonda de latón o plástico para empujar suavemente los restos hacia atrás (desde el orificio de salida hacia la entrada).
! Ingeniero usando una sonda de latón para limpiar una boquilla de carburo de tungsteno a alta presión
Paso 3: Retrodescarga del sistema
Limpiar la boquilla es solo la mitad del trabajo; Debes despejar el cabezal, o la boquilla volverá a obstruirse inmediatamente.
- Deja las boquillas limpias fuera del cabecero.
- Enciende la bomba de purga de baja presión (o agrieta brevemente la válvula principal).
- Permite que el agua de alto volumen enjuague el colector durante 30-60 segundos, eliminando cualquier escama suelta o restos que queden en la tubería.
- Reinstalar las toberas, asegurándose de que las juntas tóricas estén correctamente colocadas.
5. Consejos de expertos y trampas comunes que hay que evitar
Basándonos en décadas de experiencia en el campo y en los hilos habituales de resolución de problemas en foros de mantenimiento, aquí están los principales errores que cometen los ingenieros al tratar con sistemas de descalcificación.
- Trampa 1: Confundir el desgaste con un atasco. A menudo, los ingenieros limpian repetidamente una boquilla, pero las rayas de tigre persisten. ¿Por qué? Porque la boquilla no está atascada; Está desgastado. El agua a alta presión erosiona el orificio con el tiempo, ensanchándolo y reduciendo la fuerza del impacto. Si limpiar no funciona, tienes que medir el orificio. Implementar medición láser para el desgaste de la tobera es una práctica muy recomendada para determinar con precisión cuándo una tobera ha llegado al final de su ciclo de vida.
- Trampa 2: Ignorar la calidad del agua. Si limpias boquillas más de una vez al mes, tu problema está río arriba. Revisa las cestas de coladores y los sistemas de filtración primarios.
- Trampa 3: Usar reemplazos mediocres. Cuando una boquilla se bloquea o daña irremediablemente durante la limpieza, no la cambies por una alternativa barata. La actualización a boquillas industriales de alto rendimiento para la industria del acero garantiza geometrías de flujo interno optimizadas que son naturalmente más resistentes a obstrucciones y acumulación de incrustaciones.
6. Conclusión y reflexiones finales
Mantener un proceso de descalcificación impecable es una batalla continua contra presiones inmensas y contaminantes agresivos. Formando a tus operadores para reconocer las señales de alerta tempranas—rayas de tigre, picos de presión y vibraciones anormales—puedes pasar de un combate reactivo contra incendios a un mantenimiento proactivo.
7. Resumen rápido
| Señal de advertencia | Causa primaria | Se requiere acción inmediata |
|---|---|---|
| Rayas de tigre | Pérdida de solapamiento del spray debido a un bloqueo. | Inspecciona la superficie de acero, identifica la boquilla correspondiente y limpia. |
| Picos de presión | Los escombros limitan la salida de los cabeceros. | Monitoriza SCADA, prepárate para el apagado y el contralavado (backflush). |
| Vibraciones fuertes | Turbulencia hidráulica / Golpe de aríete. | Apágalo inmediatamente para evitar la rotura de la tubería o el sello. |
Recuerda siempre: un protocolo de limpieza segura de 15 minutos usando las herramientas de latón adecuadas te ahorrará horas de inactividad y miles de dólares en acero desguazado. No dejes que un pequeño atasco se convierta en un dolor de cabeza enorme.
¿Cuál es tu mayor reto con los sistemas de descalcificación? Deja un comentario abajo o suscríbete a nuestro boletín para recibir más consejos semanales de mantenimiento industrial y profundizaciones en dinámica de fluidos.
8. Preguntas frecuentes (FAQ)
P1: ¿Qué son exactamente las "Rayas de Tigre" y por qué importan?
Las rayas de tigre son rayas oscuras longitudinales sobre acero laminado causadas por una boquilla de desincrustación obstruida que pierde su solapamiento de spray. Representan incrustaciones de óxido enrolladas permanentemente—defectos que no pueden eliminarse mediante el procesamiento posterior y que a menudo resultan en rechazo de la bobina.
P2: ¿Puedo usar un alambre o aguja de acero para despejar una boquilla atascada?
Absolutamente no. El acero (dureza de Mohs 6–7) rayará permanentemente el orificio de precisión de las boquillas de carburo de tungsteno o cerámica, destruyendo el patrón de pulverización. Utiliza siempre sondas de latón o plástico (dureza 3–4 o menos) para empujar los restos hacia atrás, desde la salida hasta la entrada.
P3: Mi manómetro marca cero. ¿Es seguro quitar la boquilla?
Cero en el manómetro solo significa que la presión estática ha desaparecido. La energía hidráulica residual y las reflexiones del golpe de ariete pueden seguir existiendo. Siempre completa el Bloqueo/Etiquetado (LOTO): aísla la alimentación, cierra las válvulas, abre el purgado/drenado, verifica cero y etiqueta el equipo antes de acercarte.
P4: ¿Cómo sé si una boquilla está atascada o simplemente desgastada?
Si limpiar restaura el rendimiento, era un atasco. Si las rayas de tigre persisten tras la limpieza, mide el diámetro del orificio. La erosión por flujo a alta presión ensancha el orificio con el tiempo, reduciendo la fuerza de impacto. Sustituir las toberas cuando el desgaste del orificio supere el 110–115% de la especificación de diseño.
P5: ¿Por qué mi boquilla se vuelve a obstruir inmediatamente después de limpiarla?
Tú has limpiado el síntoma, no la fuente. Los restos permanecen en el colector y vuelven a entrar en la boquilla al reiniciar. Siempre haz un lavado inverso en el colector con agua de baja presión y alto volumen durante 30–60 segundos sin las boquillas antes de volver a instalarlas.